
Rachel Marie Photography is back with another awesome photo tip for us about light!
Lighting is the most important concept to understand when taking photographs. The same scene shot in two different types of light can look completely different. Follow these steps for best results!
- When shooting outdoors avoid the hours between 10am and 3pm. This mid-day light creates harsh shadows and flat colors.
- The ideal time to shoot outside is right after sunrise or right before sunset. Photographers call these times the “golden hours” because of the soft warm light that creates vibrant colors.
- If you have to shoot during mid-day, find the shade of a building or a tree and then use a reflector to bounce some sunlight onto your subject.
- Ideally, the light source should be in front of or slightly to the side of your subject to get the most flattering light. However, backlit photos (the sun is behind the subject) can be beautiful as well if you are going for more of a silhouetted look.
- When shooting indoors, try to avoid artificial light, especially florescent lighting which causes unattractive coloring.
- If taking photos inside, try using window light. It is great because it is soft and directional and having visible light helps give the face dimension. It is especially great for newborn shots.
Knowing how to use the light to your advantage will help you take beautiful photos!
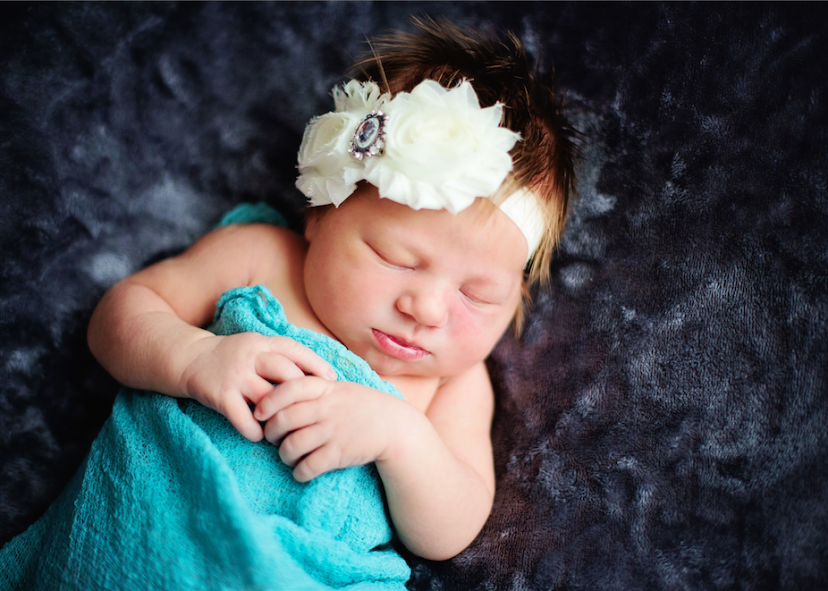
In the newborn photo, you can see an example of window light. Notice how you can see which direction the light is coming from.
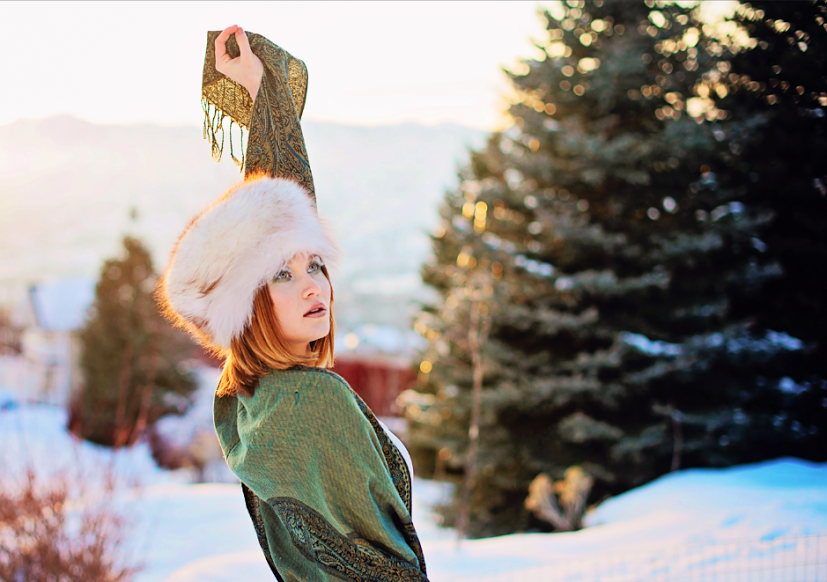
In the winter photo, we were using sunset light. Notice the warm, vibrant colors and the way that the sun highlights the fur hat. Sunset/sunrise light does a great job of highlighting your subject.